Basic Features
Microsoft Word 2010 is a program that you will be using often in CIC, and it is important that you become familiar with its main features. Below you will find the essential information on creating, modifying, and commenting on documents in Word. Word 2010 includes many of the same features as Word 97-2003 and 2007, but as the menu system has changed, the way you access certain features may be different.
Getting In
From the Start Menu in the lower left hand corner, click on the Word icon ![]() . An empty document will automatically be created for your use. Word 2010 organizes related features on a “ribbon.” Selecting a category on the ribbon—for example “Home,” “Insert” or “Review”—reveals the options available in that category. General functions are available via the File ribbon.
. An empty document will automatically be created for your use. Word 2010 organizes related features on a “ribbon.” Selecting a category on the ribbon—for example “Home,” “Insert” or “Review”—reveals the options available in that category. General functions are available via the File ribbon.
Saving a File
There are two commands for saving a file, both available from the File menu:
- Save As: Used to name a file and select a format for saving. You should use Save As to make a personal copy of a class document. Save As can also be used to save files to a several locations (for example, your student folder, the turn-in folder, and a memory stick).
- Save: Use to save changes to a file that has already been saved once.
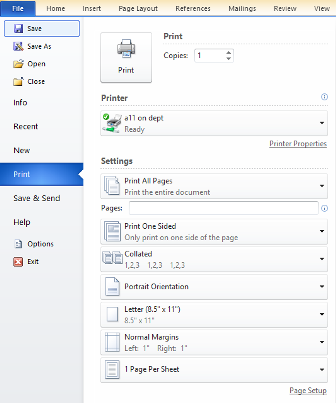
Printing a File
Choose Print from the File menu. Print allows users to print one complete copy of their document to the lab printer. You can also specify how many copies you want to print.
Formatting Text: MLA Format
The Home menu contains options for formatting text and paragraphs. To change the font or to place text in bold, italicized, or underlined type, highlight the text you want to change, then select the changes you want to make in the Font and Paragraph button groups.
![]()
Font Type/Size/Appearance: Standard MLA format requires a 12 point Times or Times New Roman font, which you can set with the font type and size options in the Home menu’s Font button group. Bolding, underlining, and italic keys are useful as well. Remember that titles of books and journals must be underlined or italicized, while essays, articles, and poems require “quotation marks.”
Font Color: While font colors generally are not used in academic papers, they are available for different kinds of assignments, such as group presentations. To change font color, select the text you want to alter and click the arrow next to the font color icon in the Home menu’s Font button group. Select your desired color from the palette that appears.
Highlighting: This function is great for editing your own paper, and for use in peer reviewing someone else’s paper. To add highlighting, select text and click the arrow next to the highlight icon on the Home menu’s Fontoptions. Select your desired color from the palette that appears.
Alignment: Use the Paragraph formatting buttons on the Home menu to align text to the right, left, or center, or to justify the text to the margins. Standard MLA format requires left-aligned text and a centered title. Use the center button instead of tabbing to center your titles.
Promote and Demote: Use these Paragraph formatting buttons on the Home menu to quickly change the indentation of selected text. This function is useful for formatting block quotations and creating outlines.
Borders: Highlight the text you wish to place a border around, and then click the border icon in the Paragraphbutton group .
Line-spacing: The Paragraph line spacing button allows you to easily single or double-space selected text.
Formatting Documents
Insert
The Insert menu allows users to add Page Breaks, Tables, Images, and Hyperlinks. This is also where you can access page header and footer settings to specify information that you want to repeat from page to page (i.e. author's last name and page numbers).

Page Breaks: Position your cursor where you want to break the page and click the Page Break button from theInsert menu’s Pages options.
Tables: Position your cursor where you want to insert your table and click the Table drop-down arrow. You may drag the cursor across the grid display to set the number of rows and columns in your table. You may also select from pre-formatted Quick Tables. 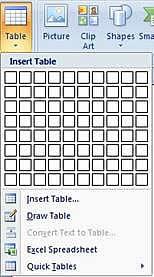
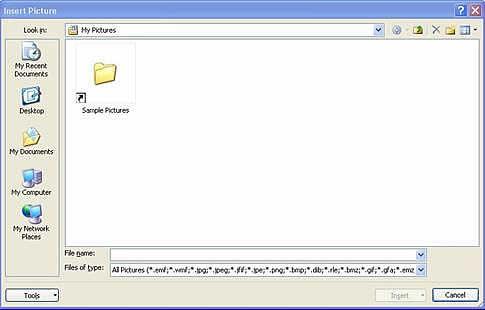
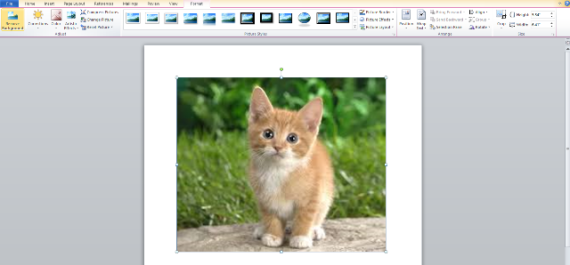
Pictures: The Insert menu’s Illustrations options allow you to add clip art, pictures, shapes, and other graphics to a document. To add a saved picture, position your cursor where you want to add the image and click thePicture button. An Insert Picture box will appear. Locate the image file and choose Insert.
After you’ve added the image, a Picture Tools contextual menu of image formatting options will appear. These options will allow you to easily frame, crop, or resize your picture. This is also where you can adjust picture brightness/contrast and alignment.
Hyperlinks: Users may place hyperlinks within a Word document to link to web resources, files on any computer drive, and email addresses. Select the text to be linked and choose Hyperlink from the Insert menu’s Linksoptions. Users have the following options in the box that appears.
- To link to a place on the WWW, type the complete URL in the Address line, beginning with http://
- Use Look in to locate a file you wish to link to on the hard drive or network.
Header/Footer: The MLA recommends that page numbers be placed in the upper right hand corner, preceded by the author's last name. To insert recurring sequential numbering in your document, click on the Page Numberbutton, then select the desired placement option. You can type your name directly into the header field next to the page number. To exit the header field, double click on the body of the document.
Page Layout
The Page Layout menu contains an option for setting document margins. Standard MLA format requires one-inch margins.
References
Citations
The Citations & Bibliography options on the References menu allow you to add citations in correct MLA format. The Bibliography feature will create a MLA-formatted works cited list from bibliographic information you have entered.
Spelling, Grammar and Thesaurus
Word’s Review menu includes options for checking spelling and grammar. The thesaurus function is also located on this menu. 
Peer Review & Revision
This Review menu is also where you will find options that allow you to insert comments into documents and to track changes between first and final drafts.
Inserting Comments
The Review menu’s Comments function allows multiple reviewers to add commentary to an essay draft. The writer can then print the commented version of his or her draft. To review an essay, do the following:
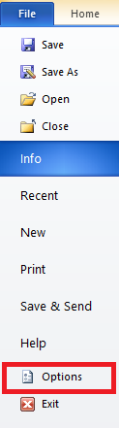
- Tell the computer who you are. The person being reviewed will want to know who said what; you need to tell the computer who you are so it can attribute your comments to you. To do this, select Options fromFile menu.
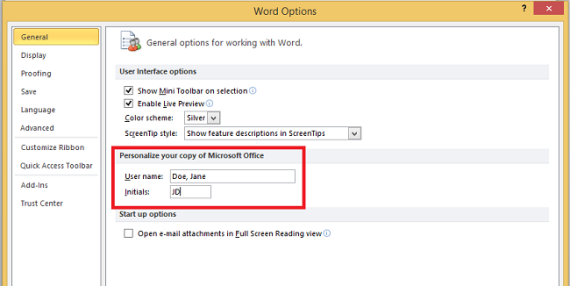
- In the Options window that appears (it should by default go to the "general" menu option--if it doesn't, select "general"), enter your name and initials under the heading Personalize Your Copy of Microsoft Office.
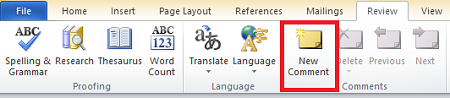
- Begin your review. To insert comments, highlight the text on which you are commenting and select New Comment from the Review menu. You can also use the ctrl+alt+m keyboard shortcut to comment on selected text. To leave the comment bubble, click outside the comment area or press Esc on the keyboard.
Merging Reviewed Documents
Once a paper has been reviewed by several people, you may want to merge all peer comments into a single document. To do so:
- Select Compare and then Combine from Word's Review menu.

- In the dialog window that opens, select the two papers you want to combine (i.e. the papers that have just been reviewed) and click okay. Save the combined document with unique file name to ensure that you don't overwrite other versions.

Tracking Changes
The Review menu's Track Changes option documents a writer's revisions by preserving deleted text in a margin box and marking added text in red. If you want to track your changes throughout a single document, you should switch on this feature before revising an essay. To do so, click the Track Changes button.